I ignored it for weeks.
That tiny, almost polite drip… drip… drip coming from my kitchen faucet didn’t seem like a big deal. It wasn’t flooding the sink. It wasn’t spraying water everywhere. It wasn’t even loud enough to be annoying unless the house was completely silent.
So I did what many people do — I adjusted the handle tighter and walked away.
But then my water bill arrived.
It was noticeably higher. Not shocking… just strange. I checked for running toilets. Outdoor taps. Hose leaks. Nothing obvious. Everything looked normal.
Except that faucet.
That tiny drip I had been ignoring suddenly felt much louder.
When I finally decided to fix it, I discovered two things that completely changed how I think about home maintenance:
Even a small faucet leak wastes a surprising amount of water
Fixing it is much easier than most people think
If you’re dealing with a slow drip, this guide will help you understand what’s happening, how much water you’re losing, and exactly how to fix it step by step — even if you’ve never repaired anything before.
How a Small Faucet Leak Quietly Wastes Huge Amounts of Water
I used to believe leaks only mattered if water was visibly flowing. But the math behind a simple drip is eye-opening.
Let’s break it down.
A faucet that drips once every second can waste thousands of liters of water per year. That’s not an exaggeration — it’s steady, continuous loss.
Here’s why:
Water loss is about time, not volume per drop.
One drop feels tiny. But when that drop falls every second, all day, every day, it adds up fast.
What I Realized After Calculating My Leak
I timed my faucet. It dripped roughly once every two seconds.
That means:
- 30 drips per minute
- 1,800 drips per hour
- Over 40,000 drips per day
Multiply that by weeks or months, and you’re literally pouring water down the drain without using it.
And that means:
- Higher water bills
- Unnecessary water waste
- Possible long-term plumbing wear
- Environmental impact
That moment changed everything. I wasn’t dealing with a harmless drip. I was dealing with constant waste.
Why Faucets Start Leaking in the First Place
Once I decided to fix mine, I wanted to understand the real cause.
Most faucet leaks are not random. They happen because specific parts wear out over time.
Here are the most common reasons.
Worn-out washer or seal
This is the most frequent cause. Rubber washers compress and degrade after years of use. Once they lose shape, water slips through.
Damaged cartridge
Many modern faucets control water flow through a cartridge. If it cracks or wears down, dripping begins.
Loose or corroded parts
Mineral buildup and regular movement loosen internal components.
High water pressure
Excess pressure can force water past sealing surfaces.
Age and daily use
Every time you turn the handle, parts rub, compress, and shift. Eventually they fail.
In my case, the culprit was simple: a worn washer that had flattened over time.
How I Fixed the Faucet Leak Step by Step
I had never repaired a faucet before. But once I understood the process, it turned out to be straightforward.
Here is exactly what I did.
Step 1: Turn Off the Water Supply
This is non-negotiable.
Look under the sink and find the shutoff valves connected to the faucet pipes. Turn them clockwise until fully closed.
Then open the faucet to release any remaining water pressure.
This prevents unexpected spraying when you open the fixture.
Step 2: Plug the Sink Drain
Small screws and parts can fall easily. I nearly lost one inside the drain.
Plugging it saves frustration.
Step 3: Remove the Faucet Handle
Most handles are secured with:
- A visible screw
- A hidden screw under a cap
Once loosened, gently lift the handle off.
This reveals the internal mechanism.
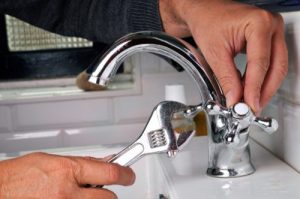
Step 4: Remove the Cartridge or Stem
Use a wrench or pliers to carefully unscrew the retaining nut.
Then pull out the cartridge or stem assembly.
Take note of how everything fits. I snapped a quick photo to help with reassembly.
Step 5: Inspect the Washer and Seals
This is where I found the problem.
The washer was flattened, slightly cracked, and stiff instead of flexible.
That tiny worn ring was responsible for months of dripping.
Step 6: Replace the Damaged Part
I took the old washer to a hardware store to match the size exactly.
Installation was simple:
- Remove old washer
- Clean seating area
- Insert new washer
That’s it.
Step 7: Reassemble the Faucet
Reverse the disassembly steps:
- Reinsert cartridge
- Tighten retaining nut
- Reattach handle
Make sure everything is snug but not overly tight.
Step 8: Turn Water Back On and Test
Slowly open the shutoff valves.
Then run the faucet normally and turn it off.
No drip.
For the first time in months, the sink was completely silent.
How Long the Entire Repair Took
From start to finish, including a trip to buy the washer, the entire job took less than one hour.
The actual repair time was about 20 minutes.
That’s when I realized how unnecessary all that wasted water had been.
Practical Tips That Made the Repair Easier
These small details helped me avoid mistakes.
Take photos before removing parts
It helps with correct reassembly.
Clean mineral buildup
Scale can prevent proper sealing.
Replace parts with exact size matches
Even slight differences cause leaks.
Work slowly and gently
Forcing components can damage threads.
Test thoroughly after repair
Run water multiple times and observe carefully.
Mistakes I Nearly Made (And You Should Avoid)
These are common and can make things worse.
Ignoring the leak for too long
The longer you wait, the more water you waste.
Overtightening the faucet handle
This does not stop leaks. It damages internal parts.
Using the wrong replacement washer
Incorrect size leads to continued dripping.
Skipping cleaning before installing new parts
Debris prevents proper sealing.
Forgetting to turn off water before disassembly
This creates instant chaos.
Real-Life Example: My Neighbor’s “Harmless” Drip
After fixing my faucet, I mentioned it to a neighbor who had a similar drip.
He had ignored his for nearly a year.
His water bill had steadily increased, but he blamed seasonal use. When he finally fixed the faucet, his bill dropped noticeably within one billing cycle.
That’s how consistent drip loss affects real households.
How to Check If Your Faucet Is Wasting Water
Here’s a quick test I now do regularly.
- Turn faucet fully off
- Dry the spout tip completely
- Watch for 60 seconds
If a drop forms, you have a leak.
Even slow formation counts.
Long-Term Prevention Habits I Follow Now
Fixing the leak once isn’t enough. Prevention matters.
Here’s what I do regularly:
Check for drips monthly
Clean faucet base and handle area
Avoid slamming handles shut
Replace washers every few years
Monitor water bill changes
These simple habits prevent silent waste.
How Much Water I Saved After Fixing It
My next water bill was noticeably lower.
Not dramatically life-changing — but clearly reduced.
More importantly, I stopped wasting clean water continuously for no reason.
That felt just as important as saving money.
Frequently Asked Questions
How much water can a dripping faucet waste in a year?
Even one drip per second can waste thousands of liters annually. The exact amount depends on drip speed, but the loss is always significant over time.
Can I fix a faucet leak without plumbing experience?
Yes. Most faucet leaks involve simple part replacement that beginners can handle with basic tools.
Should I replace the whole faucet instead of repairing it?
If the faucet is very old or heavily corroded, replacement may be better. Otherwise, small part repairs are usually effective and inexpensive.
Why does my faucet still drip after replacing the washer?
Possible causes include incorrect washer size, damaged cartridge, debris inside valve seat, or high water pressure.
How often should faucet washers be replaced?
Typically every few years, depending on usage and water quality. Hard water areas may require more frequent replacement.
Final Thoughts:
That tiny drip taught me something simple but powerful.
Small problems are rarely small when they run continuously.
A faucet leak doesn’t look urgent. It doesn’t feel like an emergency. But day after day, drop after drop, it wastes water, increases bills, and strains plumbing.
Fixing mine took less than an hour.
Ignoring it cost months of unnecessary water loss.
Now, I never overlook small household issues — especially ones that repeat constantly. Because the truth is, steady waste is the most expensive kind.
If your faucet is dripping right now, don’t wait.
Turn off the water. Open the handle. Check the washer. Replace what’s worn.
You’ll save water, reduce bills, and gain confidence knowing you solved the problem yourself.
And best of all, you’ll finally enjoy something surprisingly satisfying:
A completely silent faucet.