It started with a sound so small I almost ignored it.
Drip.
Pause.
Drip.
At first, I thought it was just leftover water sliding down the tap after brushing my teeth. But when I woke up at 2:30 a.m. and heard the same steady rhythm echoing through the quiet house, I knew something wasn’t right.
By morning, the sink had tiny splash marks everywhere. The faucet I’d used normally the night before had suddenly turned into a slow, stubborn drip machine.
If this just happened to you, you’re probably wondering the same things I did:
Is this serious?
Can I fix it myself?
Do I need a plumber?
Will my water bill shoot up?
The good news is this: a dripping bathroom faucet is one of the most common and fixable home problems. I managed to stop mine the same day with simple tools and a little patience. In this guide, I’ll walk you through exactly what caused it, how to fix it step by step, and what mistakes to avoid so it doesn’t come back.
Why Your Bathroom Faucet Suddenly Started Dripping
When a faucet starts dripping “overnight,” it usually didn’t actually break overnight. Something inside slowly wore out, shifted, or loosened — and finally reached the point where it couldn’t seal properly anymore.
Here are the most common causes.
1. Worn-Out Washer or Rubber Seal
This is the number one reason faucets drip.
Inside most faucets is a small rubber washer that presses tightly to stop water flow. Over time, it becomes stiff, cracked, or flattened from constant pressure. Once it loses flexibility, water slips past it.
That’s exactly what happened to mine.
2. Loose or Damaged O-Ring
The O-ring is a small circular rubber ring that keeps parts sealed and aligned. When it wears down or shifts, water finds a way through.
3. Mineral Buildup
If your water contains minerals, deposits can build up around internal components. This prevents the faucet from sealing tightly, even if parts are still in good shape.
4. Cartridge Wear (Common in Modern Faucets)
Single-handle faucets usually use a cartridge to control flow and temperature. When the cartridge wears out, dripping starts — often suddenly.
5. Water Pressure Changes
Sometimes the faucet isn’t the main problem. Increased water pressure in your home can push water through small gaps that previously held firm.
Why You Should Fix a Dripping Faucet Quickly
I used to think a slow drip was harmless. It’s not.
Here’s what surprised me after researching and dealing with it:
- A slow drip can waste hundreds of liters of water each month
- Continuous moisture can damage sink surfaces
- Mold and mineral stains can form
- The internal damage often gets worse over time
- Your water bill quietly increases
Most importantly, the longer you wait, the harder the repair becomes.
Fixing mine early meant replacing one small rubber washer instead of an entire faucet.
Step-by-Step: How I Fixed My Dripping Bathroom Faucet
You don’t need advanced plumbing skills for this. If you can follow simple instructions and handle basic tools, you can do it.
Step 1: Turn Off the Water Supply
This is essential.
Look under your sink. You’ll see two small valves connected to the pipes. Turn both clockwise until fully closed.
Then turn on the faucet to release any remaining water pressure.
If no water comes out, you’re ready.
Step 2: Plug the Sink Drain
Trust me, don’t skip this.
Small screws and parts can easily fall into the drain and disappear forever. I used a sink stopper and also placed a cloth over it for safety.
Step 3: Remove the Faucet Handle
Most faucet handles have a hidden screw.
Check:
- Under a decorative cap
- Behind the handle
- On the side
Use a screwdriver or hex key to remove it. Gently lift the handle off.
If it’s stuck, wiggle slowly. Don’t force it.
Step 4: Access the Internal Components
Once the handle is off, you’ll see the faucet’s inner assembly.
Depending on your faucet type, you may see:
- A cartridge
- A valve stem
- A retaining nut
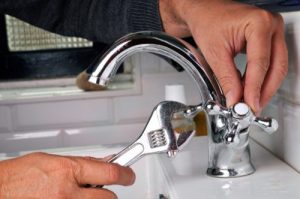
Use an adjustable wrench to loosen and remove the top assembly carefully.
Take note of how parts are arranged. I took photos with my phone to remember the order.
Step 5: Inspect the Washer and O-Ring
This is where the problem usually reveals itself.
In my case, the washer looked flattened and slightly cracked. It no longer had that firm rubber bounce.
Check for:
- Cracks
- Hardness
- Flattening
- Mineral deposits
If anything looks worn, replace it.
Step 6: Replace the Damaged Parts
Take the old washer or cartridge to a hardware store and match the size exactly. Even a tiny difference can cause leaks.
Replacement parts are inexpensive and widely available.
Install the new washer or cartridge in the same position as the old one.
Step 7: Clean Mineral Deposits
Before reassembling, clean everything.
I soaked parts in vinegar for 20 minutes to dissolve mineral buildup. Then rinsed and wiped them dry.
This step improves sealing and extends faucet life.
Step 8: Reassemble the Faucet
Put everything back in reverse order.
Tighten securely but don’t overtighten. Excess force can damage new parts.
Step 9: Turn Water Back On and Test
Slowly open the supply valves.
Turn the faucet on and off several times. Check carefully for leaks.
When I tested mine, the silence was immediate. No drip. No sound. Just normal water flow.
Problem solved.
Practical Tips That Made the Repair Easier
These small decisions made a big difference in my experience.
Take Photos During Disassembly
You’ll thank yourself when reassembling.
Work Slowly
Rushing leads to stripped screws and misplaced parts.
Replace, Don’t Reuse
If a rubber piece looks worn, replace it. Don’t try to “make it work.”
Keep Spare Washers at Home
They’re cheap and save emergency trips later.
Check Both Hot and Cold Sides
Sometimes both sides show wear, even if only one drips.
Mistakes People Commonly Make
I nearly made a few of these myself.
Forgetting to Shut Off Water
This causes instant flooding when parts are removed.
Using the Wrong Replacement Size
Even slight differences prevent proper sealing.
Overtightening Components
This damages threads and causes future leaks.
Ignoring Mineral Buildup
Replacing parts without cleaning deposits leads to recurring drips.
Reassembling Incorrectly
Misaligned parts prevent proper pressure sealing.
Real-Life Example: When Replacement Wasn’t Enough
A friend of mine replaced the washer but still had dripping.
The real issue was deep mineral corrosion inside the valve seat. The surface was no longer smooth enough for sealing.
He used a simple valve seat tool to smooth it out — and the drip stopped instantly.
Lesson: If new parts don’t fix the issue, the sealing surface itself may need cleaning or smoothing.
How to Prevent Faucet Dripping in the Future
After fixing mine, I wanted to avoid doing it again anytime soon.
Here’s what helps:
- Turn faucets off gently, not forcefully
- Clean aerators every few months
- Remove mineral buildup regularly
- Check for early signs of leaking
- Replace washers every few years if water is hard
Small maintenance prevents bigger repairs.
Frequently Asked Questions
Why did my faucet start dripping suddenly overnight?
The damage usually happens gradually. The drip begins once wear reaches a tipping point where the seal can’t hold pressure anymore.
Can a dripping faucet stop on its own?
Very rarely. Temporary stopping can happen due to pressure shifts, but the underlying issue remains and usually worsens.
Is it expensive to fix a dripping bathroom faucet?
No. Most repairs cost very little if you do them yourself. Washers and O-rings are inexpensive, and many repairs require no special tools.
How long does it take to fix a dripping faucet?
For beginners, about 30 to 60 minutes. Once familiar, it can take less than 20 minutes.
When should I call a plumber?
If the faucet body is cracked, corrosion is severe, or leaks continue after replacing internal parts, professional help may be needed.
Final Thoughts: The Drip That Taught Me a Lesson
That quiet drip in the middle of the night felt like a small annoyance — but fixing it taught me something valuable.
Most home problems don’t need panic. They need understanding.
A dripping faucet isn’t mysterious or complicated. It’s simply a worn seal, a loose part, or buildup interfering with pressure control. Once you understand that, the repair becomes straightforward.
The moment my faucet stopped dripping, the house felt calm again. No echoing sound. No wasted water. No worry about damage or rising bills.
If your bathroom faucet started dripping overnight, don’t stress. With a few basic tools and careful steps, you can fix it yourself and prevent bigger problems later.
And if you hear that drip tonight — you already know exactly what to do.