A leaky faucet might seem like a small annoyance, but over time, it can waste a surprising amount of water and increase your utility bill. That constant dripping sound is more than irritating—it’s a sign that something isn’t working properly.
The good news? Most faucet leaks are simple to fix, even if you’re not an expert. With a few basic tools and the right guidance, you can stop the leak, save money, and avoid calling a plumber.
In this guide, I’ll share practical, real-world leaky faucet fixes, based on common issues homeowners face, along with step-by-step solutions you can apply immediately.
Why Faucets Start Leaking
Before fixing the problem, it helps to understand what causes it. In my experience, most leaks come down to small worn-out parts rather than major damage.
Common Causes
-
Worn-out washers or O-rings
-
Corroded valve seats
-
Loose or damaged parts
-
High water pressure
-
Mineral buildup from hard water
Even a tiny worn washer can cause a steady drip if left unchecked.
Identify Your Faucet Type First
Different faucets have different mechanisms, and the repair method depends on the type:
-
Compression faucets: Use rubber washers (common in older homes)
-
Ball faucets: Found in many kitchen sinks
-
Cartridge faucets: Common in modern bathrooms
-
Ceramic disk faucets: Durable and newer design
Tip: If you’re unsure, take a photo of your faucet before disassembling—it helps during reassembly.
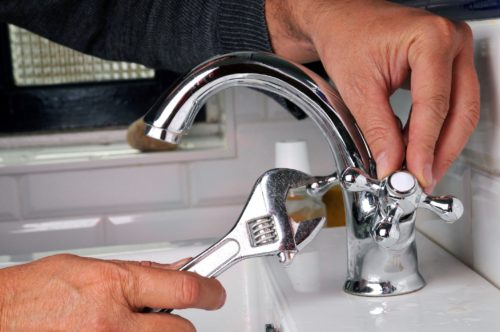
Basic Tools You’ll Need
Most fixes require simple tools:
-
Adjustable wrench
-
Screwdriver (flathead and Phillips)
-
Replacement washers or cartridges
-
Plumber’s tape
-
Cleaning cloth
-
Small brush or toothbrush
Having these ready makes the repair process smooth and stress-free.
Step-by-Step: Fixing a Leaky Faucet
Step 1: Turn Off the Water Supply
-
Locate the shut-off valves under the sink
-
Turn them clockwise to stop water flow
-
Open the faucet to release any remaining pressure
Important: Never skip this step—it prevents accidental flooding.
Step 2: Disassemble the Faucet
-
Remove the handle (usually secured with a screw)
-
Take apart the faucet carefully
-
Keep all parts organized to avoid confusion later
Step 3: Inspect Key Components
Look for signs of wear or damage:
-
Cracked or flattened washers
-
Worn O-rings
-
Corrosion or mineral buildup
-
Damaged cartridge
These small parts are often the main cause of leaks.
Step 4: Replace or Clean Parts
Fixing a Worn Washer (Most Common Issue)
-
Remove the old washer
-
Replace it with a new one of the same size
-
Reassemble the faucet
Fixing O-Rings
-
Slide off the damaged O-ring
-
Replace it with a new one
-
Apply plumber’s grease for smoother movement
Cleaning Mineral Buildup
-
Soak parts in vinegar for 15–30 minutes
-
Scrub gently with a brush
-
Rinse and dry before reassembling
Step 5: Reassemble and Test
-
Put all parts back in place
-
Turn the water supply back on
-
Test the faucet for leaks
If the dripping stops, you’ve successfully fixed it.
Fixes for Specific Faucet Problems
1. Faucet Dripping from the Spout
Cause: Worn washer or cartridge
Fix: Replace the washer or cartridge
2. Leak Around the Handle
Cause: Damaged O-ring or seal
Fix: Replace the O-ring and tighten components
3. Low Water Pressure
Cause: Clogged aerator or mineral buildup
Fix:
-
Unscrew the aerator
-
Clean it with vinegar
-
Reattach and test
4. Constant Dripping Even After Repair
Possible reasons:
-
Incorrect part size
-
Valve seat corrosion
-
Internal damage
Solution: Replace the valve seat or consider professional help
Quick Temporary Fixes
If you don’t have time for a full repair, these quick solutions can help:
-
Tighten loose handles or fittings
-
Wrap plumber’s tape around threads
-
Use a rubber band or cloth to reduce dripping temporarily
These fixes are not permanent but can reduce water waste until proper repair is done.
Common Mistakes to Avoid
-
Using the wrong replacement parts
-
Over-tightening components (can cause damage)
-
Skipping cleaning before reassembly
-
Ignoring small leaks (they worsen over time)
-
Forgetting to turn off the water supply
Avoiding these mistakes saves time and prevents further issues.
When to Call a Professional
While many leaks are DIY-friendly, some situations require expert help:
-
Persistent leaks after multiple repairs
-
Severe corrosion or damage
-
Leaks inside walls or under floors
-
Complex faucet systems
In such cases, a plumber can diagnose and fix the issue safely.
Preventing Future Faucet Leaks
From personal experience, prevention is much easier than repeated repairs.
Simple Tips
-
Avoid turning faucets too tightly
-
Clean aerators regularly
-
Install water softeners if you have hard water
-
Replace worn parts early
-
Check for leaks periodically
Regular maintenance keeps your faucet working smoothly for years.
Real-Life Example
A homeowner noticed a slow drip in their kitchen faucet. Instead of ignoring it, they:
-
Turned off the water supply
-
Opened the faucet and found a worn washer
-
Replaced it within 15 minutes
Result: The leak stopped completely, saving water and avoiding a larger plumbing issue later.
Benefits of Fixing a Leaky Faucet
-
Saves water and reduces utility bills
-
Prevents further damage to fixtures
-
Eliminates annoying dripping sounds
-
Improves overall home maintenance
-
Extends faucet lifespan
Even a small fix can make a big difference over time.
Final Thoughts
Leaky faucets are one of the most common household problems—but also one of the easiest to fix. By understanding the cause, using the right tools, and following simple steps, you can handle most repairs yourself.
Taking action early not only saves money but also prevents bigger plumbing issues down the line. With a little effort and regular maintenance, your faucet can stay leak-free and efficient for years.