It started as a tiny sound I barely noticed.
Drip… drip… drip…
At first, it blended into the background noise of the house. But over time, it became impossible to ignore. The sound echoed at night. It interrupted my focus during the day. And worst of all, I kept thinking about the wasted water and the rising utility bill.
I assumed fixing a leaky faucet would be complicated. Maybe expensive. Probably something only a plumber should handle.
But one morning, after watching that steady drip fall for the hundredth time, I decided to try fixing it myself.
Ten minutes later, the leak was gone.
No special tools. No plumbing experience. No professional help.
Just a simple fix that most homeowners can do in less time than it takes to make a cup of tea.
If you’re dealing with a leaky faucet right now, this guide will show you exactly what I did, step by step, so you can stop the drip quickly and confidently.
Why Faucets Start Leaking in the First Place
Before fixing anything, I wanted to understand what actually causes a faucet to leak. Once I understood the reason, the repair made complete sense.
Most faucets leak because something inside stops sealing properly.
Water pressure inside your plumbing system is constant. When you turn the faucet off, internal parts press together tightly to block water flow. If any of those parts wear down, shift, or get damaged, water slips through.
Here are the most common causes.
Worn Rubber Washer
This is the main culprit in many faucets.
Every time you turn the handle, a rubber washer presses against a valve to stop water. Over time, friction and pressure flatten or crack the rubber. Once it loses shape, sealing fails.
Damaged Cartridge
Many modern faucets use cartridges to control water flow and temperature. When a cartridge wears out, leaking often begins suddenly.
Loose Parts
Handles, nuts, or internal components can loosen slightly over time. Even a small gap can allow water through.
Mineral Buildup
Hard water leaves behind deposits that interfere with proper sealing. These deposits can prevent parts from sitting flush.
Worn O-Rings
O-rings keep internal components aligned and sealed. When they deteriorate, leaks follow.
Understanding these causes helped me focus on the simplest and most likely fix first.
And that’s exactly what worked.
The Simple 10-Minute Fix That Stopped My Faucet Leak
What surprised me most was how quick the repair actually was.
Here’s the exact process I followed.
Step 1: Turn Off the Water Supply
This is non-negotiable.
Look under your sink. You’ll see two small shut-off valves connected to the pipes. Turn both clockwise until tight.
Then turn the faucet on briefly to release any remaining water pressure.
If no water flows, you’re safe to proceed.
This step took less than a minute.
Step 2: Block the Sink Drain
Small parts can easily fall into the drain while working. That creates a much bigger problem.
I inserted the sink stopper and placed a cloth over it for extra protection.
This takes seconds and saves frustration.
Step 3: Remove the Faucet Handle
Most handles are held in place by a small screw.
Sometimes it’s visible. Often it’s hidden under a decorative cap or behind the handle.
I gently removed the cap with a flat tool and unscrewed the handle. Then I lifted it straight up.
If the handle feels stuck, wiggle gently instead of forcing it.
Time spent: about two minutes.
Step 4: Access the Internal Valve or Cartridge
Once the handle was off, I saw the top of the faucet’s internal assembly.
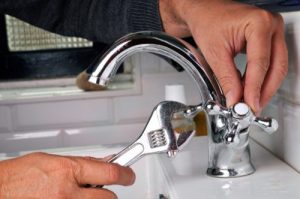
There was a retaining nut holding everything in place. I used an adjustable wrench to loosen and remove it.
Then I lifted out the valve stem.
Inside, I found the problem immediately.
The rubber washer at the base looked flattened and slightly cracked. It wasn’t sealing anymore.
That tiny piece of rubber was causing all the dripping.
Step 5: Replace the Washer or Cartridge
I removed the old washer and compared it to a spare I had from a basic plumbing kit.
If you don’t have one, just take the old part to a hardware store. Matching size matters.
I installed the new washer in the same position and secured it firmly.
This step took less than three minutes.
Step 6: Clean Mineral Deposits
Before reassembling, I wiped away visible mineral buildup from the internal surfaces.
If buildup is heavy, soaking parts in vinegar for 15 to 20 minutes works well.
Mine only needed a quick wipe.
Step 7: Reassemble Everything
I placed the valve stem back, tightened the retaining nut, and reattached the handle.
Important detail: tighten firmly but not excessively. Overtightening can damage parts.
Step 8: Turn Water Back On and Test
I slowly reopened the shut-off valves.
Then I turned the faucet on and off several times.
Silence.
No dripping.
Total repair time: about 10 minutes.
Why This Quick Repair Works So Well
What makes this fix so effective is how faucet pressure works.
Water constantly pushes against the internal seal. Even tiny wear creates space for leakage.
Replacing the worn component restores full pressure resistance instantly.
You’re not patching a symptom. You’re restoring the original seal.
That’s why the dripping stops immediately after proper replacement.
Practical Tips That Made the Repair Faster
These small decisions helped me finish the job quickly and smoothly.
Take a Photo Before Removing Parts
A quick phone photo helps you reassemble correctly.
Keep a Small Plumbing Kit at Home
Basic washers and O-rings are inexpensive and useful for many repairs.
Work Slowly but Efficiently
Rushing causes mistakes. Calm, steady movement saves time overall.
Clean Parts Before Reassembly
Even small debris can affect sealing.
Test Carefully After Repair
Run water several times to confirm stability.
Common Mistakes That Can Turn a 10-Minute Fix Into an Hour
I learned about these mistakes while researching and nearly made one myself.
Not Turning Off Water Completely
Even slight pressure can spray water when parts are removed.
Using the Wrong Washer Size
Incorrect size prevents proper sealing.
Overtightening Components
Too much force damages threads and rubber parts.
Ignoring Internal Corrosion
If surfaces are rough, sealing may fail even with new parts.
Losing Small Screws or Pieces
Always block the drain before starting.
Avoiding these mistakes keeps the repair simple and quick.
Real-Life Example: When the Leak Wasn’t the Washer
A neighbor tried replacing his washer but the faucet still leaked.
The issue turned out to be a worn cartridge instead.
Once he replaced the cartridge, the leak stopped instantly.
This shows why identifying the faucet type matters. If replacing a washer doesn’t work, check the cartridge next.
How to Tell If Your Faucet Can Be Fixed Quickly
A quick repair usually works when:
- The drip is steady but slow
- The faucet turns normally
- No visible cracks in the faucet body
- Leak comes from the spout, not the base
- Faucet is less than 10 to 15 years old
If these conditions apply, chances are high you can fix it in minutes.
How to Prevent Faucet Leaks From Coming Back
After fixing mine, I wanted to avoid repeat repairs.
These habits help extend faucet life.
Turn Handles Gently
Forceful closing damages washers faster.
Clean Mineral Buildup Periodically
Simple vinegar cleaning prevents hard deposits.
Check for Early Dripping
Fixing small leaks early prevents larger wear.
Replace Rubber Parts Every Few Years
Especially if you have hard water.
Preventive care saves time and money.
Frequently Asked Questions
How much water does a leaky faucet waste?
Even a slow drip can waste hundreds of liters of water per month. Over a year, that becomes significant both environmentally and financially.
Can I fix a leaky faucet without tools?
Most repairs require at least a screwdriver and adjustable wrench. These basic tools are enough for many common faucet repairs.
How do I know if I need to replace the cartridge instead of the washer?
Single-handle faucets usually use cartridges. If replacing a washer doesn’t stop the leak, the cartridge is likely worn.
Is it safe for beginners to repair a faucet?
Yes. As long as you shut off the water supply and follow steps carefully, faucet repair is one of the safest and simplest home fixes.
When should I call a plumber instead of fixing it myself?
Call a professional if the faucet body is cracked, corrosion is severe, or leaks continue after replacing internal parts.
Conclusion
Fixing my leaky faucet taught me something important.
Many home issues look complicated from the outside but are simple once you understand the cause.
That constant dripping sound that felt overwhelming turned out to be a small worn washer. Replacing it took minutes, cost almost nothing, and restored complete silence.
No more wasted water.
No more annoying sound.
No more worry about damage or rising bills.
If your faucet is leaking right now, you don’t need to wait, stress, or assume the repair is difficult.
Turn off the water.
Open the handle.
Check the seal.
Replace the worn part.
Ten minutes of effort can solve a problem that might otherwise bother you for months.
And once you fix it yourself, you’ll never look at a dripping faucet the same way again.